Printer Management Instructions
Printer Management
Covered in this procedure document are the following topics:
Add a Printer
If you find that you do not have the printer on your list of selected printers in the document that you are printing from, you can add a printer using the following instructions.
- Open a web browser or go to the intranet
- In the address line type:
- \\SDPrint (make sure http: is not present) for printers at Goethe and NACY
- \\RSP-PRINT (make sure http: is not present) for printers at SRWTP
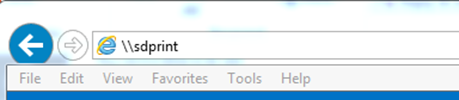
- You will see a list of the printers and their description that are assigned to that print server
NOTE: The printers are named according to their location and model.
Example: S1E_ADMN_HP5550_1 = South building, 1st floor, East Wing, Admin Section, HP5550 printer
- Scroll down until you find the printer that you want to use
- Double click on it
- The following screen will appear

- Once the printer is found, the printer status window will appear on your screen
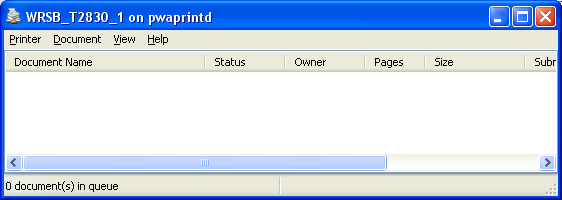
- You can simply close this window (click on the X) and return to your document to print
- That printer will now be on your list of printers
Back to Top
Remove a Printer
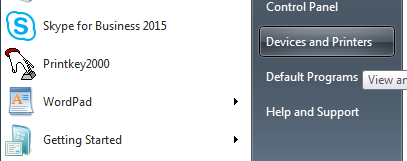
- To remove a printer from your printer list start by clicking on the Start button
- Click on Device and Printers
- You will see a screen similar to this:
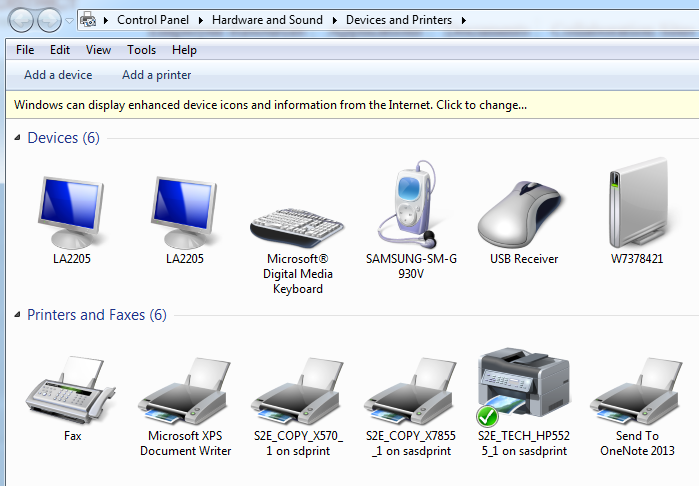
- Find the printer that you want to delete
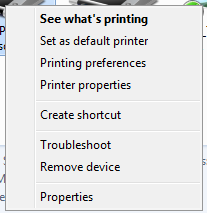
- Right click on it
- From the menu choose Remove Device
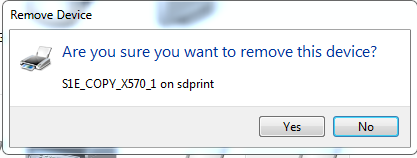
- When this message appears, click Yes
- The printer will be deleted, close the window to exit
Back to Top
Set a Default Printer
- To set a printer as your default printer start by clicking on the Start button
- Click on Device and Printers

- You will see a screen similar to this:
- Find the printer that you want to as the default
- Right click on it
- From the menu choose Set as default printer
- No message will appear, just close the window to exit